


Table of contents
- Out with the old, in with the new
- Your default interpreter
- Install the Python interpreter of your choice
- Install the venv module for your selected interpreter
- Creating the virtual environment
- Activate the virtual environment
- Perform a quick test.
- Deactivate the virtual environment
- Current shell session only
- Further reading
Out with the old, in with the new
Then and now: virtualenv & pyvenv. vs. venv.
The procedures discussed here apply to Python 3.6 to 3.9. For earlier versions of Python, you will need a (different) tool called virtualenv, which is not discussed here.
From Python 3.3 to 3.4, the recommended way to create a virtual environment was to use the pyvenv command-line tool, which is not discussed here. pyvenv is deprecated in 3.6.
For Python 3.6 and above, the venv module from the standard library is the recommended way to create a virtual environment. This method is discussed here.
Your default interpreter
Multiple versions of Python 3 can live on Linux at the same time. So let's check what is the current default Python 3 interpreter. My machine's default Python3 interpreter is set to version 3.8.10. Or put differently, the python3 command resolves to Python version 3.8.10.
Use the python3 -V or python --version commands to check your default python3 interpreter.
rudi@demo:~/$ python3 -V
Python 3.8.10
rudi@demo3:~/$ python3 --version
Python 3.8.10
To further confirm this setting, execute the python3 command on the command line. This will invoke the default interpreter.
rudi@demo:~/$ python3
Python 3.8.10 (default, Nov 26 2021, 20:14:08)
[GCC 9.3.0] on linux
Type "help", "copyright", "credits" or "license" for more information.
>>>
Install the Python interpreter of your choice
CAUTION: Ubuntu Linux 20.04 ships with Python 3.8. If you require a different Python version for your projects, I STRONGLY advise AGAINST replacing Ubuntu's system Python instance. Fiddling with Ubuntu's system Python can cause things to break! Trust me. I have had to re-install Ubuntu a few times as a result. I recommend that you install any other version as a separate instance while leaving the system Python instance untouched.
I needed Python 3.9, so I installed it.
rudi@demo:~/$ sudo apt install python3.9
This will install Python 3.9 to this location, here: /usr/bin/python3.9
Test your newly installed interpreter by launching it from the command line. Remember that, depending on your system's configuration, using python3 (without the full version number) will invoke your system's default interpreter, which may be a different version at this stage. So use the full version number. In my case, the command is python3.9.
rudi@demo:~/$ python3.9
Python 3.9.5 (default, Nov 23 2021, 15:27:38)
[GCC 9.3.0] on linux
Type "help", "copyright", "credits" or "license" for more information.
>>>
Install the venv module for your selected interpreter
To create a virtual environment for your interpreter of choice, install the relevant version of the venv module. This module is part of the python**-venv package. Since I will be using Python 3.9, I installed the 3.9 variant of the package, which is named python3.9-venv. Simply replace the version number to match the version you are using.
rudi@demo:~/$ sudo apt install python3.9-venv
Creating the virtual environment
You can create the virtual environment anywhere you prefer. To create the environment execute the python3.9 -m venv *directory* command inside your directory of choice. In this example, I am creating it inside my Python project's directory.
rudi@demo:~/Projects/MyCoolApp$ python3.9 -m venv my_env
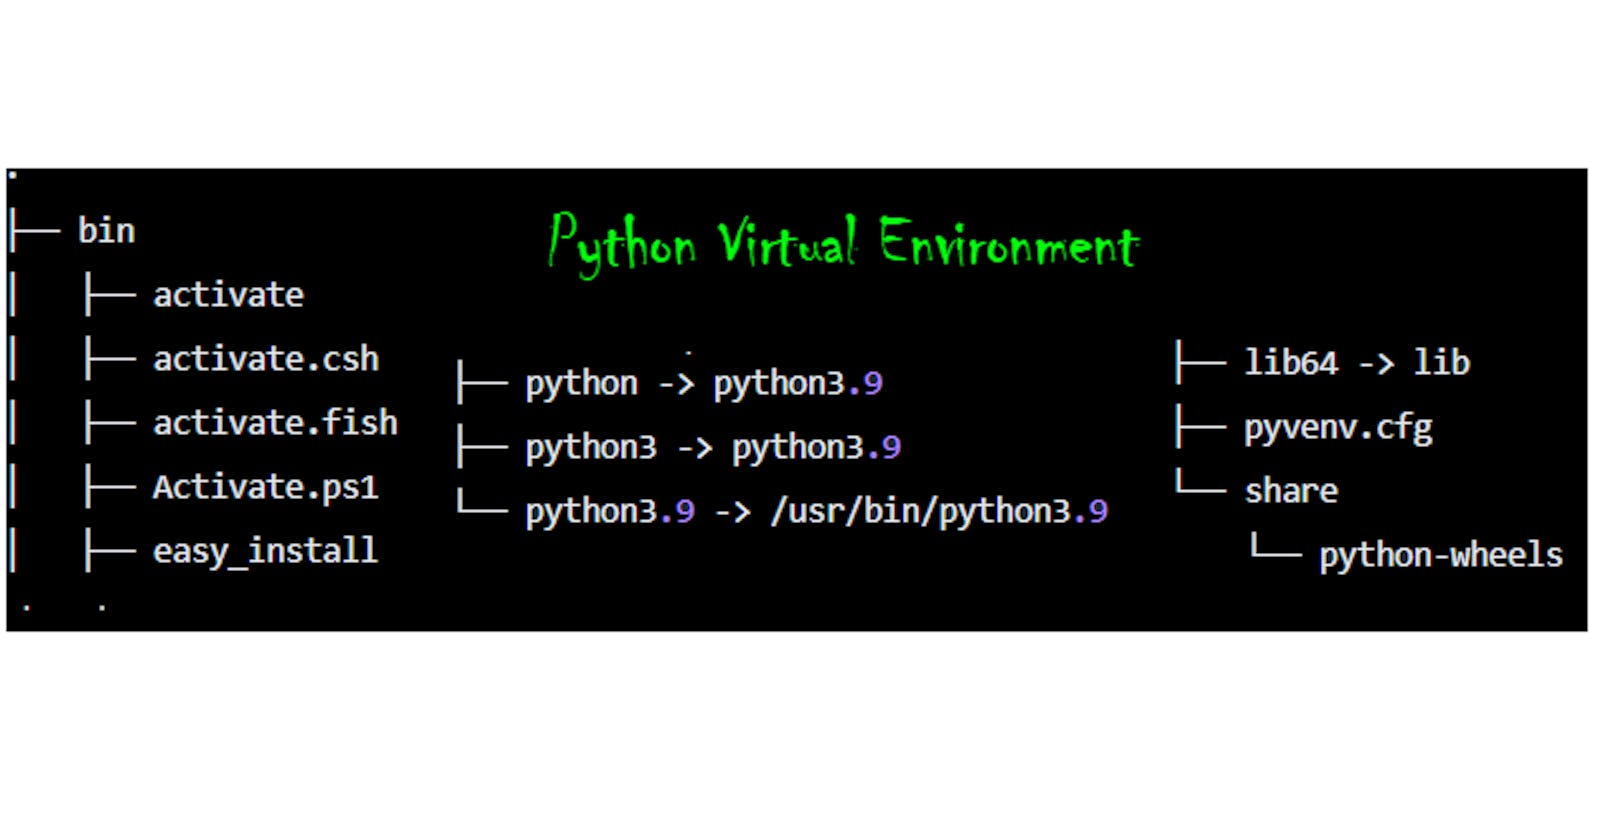
The command created a directory, my_env, which contains the virtual environment. The graphic below shows the layout of the my_env directory's structure.
.
├── bin
│   ├── activate
│   ├── activate.csh
│   ├── activate.fish
│   ├── Activate.ps1
│   ├── easy_install
│   ├── easy_install-3.9
│   ├── pip
│   ├── pip3
│   ├── pip3.9
│   ├── python -> python3.9
│   ├── python3 -> python3.9
│   └── python3.9 -> /usr/bin/python3.9
├── include
├── lib
│   └── python3.9
├── lib64 -> lib
├── pyvenv.cfg
└── share
    └── python-wheels
Activate the virtual environment
You are almost done.
All that is left to do, is to activate the virtual environment. Do this by executing the command source my_env/bin/activate.
rudi@demo:~/Projects/MyCoolApp$ source my_env/bin/activate
You will now see the appearance of the text string (my_env) in front of the command line prompt.
(my_env) rudi@demo:~/Projects/MyCoolApp$
Job done!
Perform a quick test.
While the virtual environment is active, the python3 command (without full version numbers) will resolve to the virtual environment's interpreter. Which is version 3.9.5 in this example.
(my_env) rudi@demo:~/Projects/MyCoolApp$ python3 -V
Python 3.9.5
Note that using python (without any version number) will also resolve to the virtual environment's interpreter.
(my_env) rudi@demo:~/Projects/MyCoolApp$ python -V
Python 3.9.5
Similarly, when executing the command python3, the virtual environment's interpreter will be invoked.
(my_env) rudi@demo:~/Projects/MyCoolApp$ python3
Python 3.9.5 (default, Nov 23 2021, 15:27:38)
[GCC 9.3.0] on linux
Type "help", "copyright", "credits" or "license" for more information.
>>>
That's it. You are good to go.
Deactivate the virtual environment
To deactivate the virtual environment, simply execute deactivate.
(my_env) rudi@demo:~/Projects/MyCoolApp$ deactivate
rudi@demo:~/Projects/MyCoolApp$
Current shell session only
Note that the activated virtual environment only applies to the shell session in which it was activated. If you launch an additional shell session, that additional session will apply the system's default Python interpreter, and not the virtual environment's interpreter. This means you have to activate a virtual environment for each subsequent shell session if so required.
As soon as the shell session terminates, so does the virtual environment.
Further reading
If you are ready to dig deeper into virtual environments and want to peek under the hood, I recommend that you start with the official Python documentation covering this topic, here.
That's it from me!